
| Summary: To sync the Dogtra 1900S collar, turn off both the collar and transmitter. Press and hold the pairing button on each for 3-5 seconds until the LED blinks. If syncing fails, reset and ensure both devices are charged. |
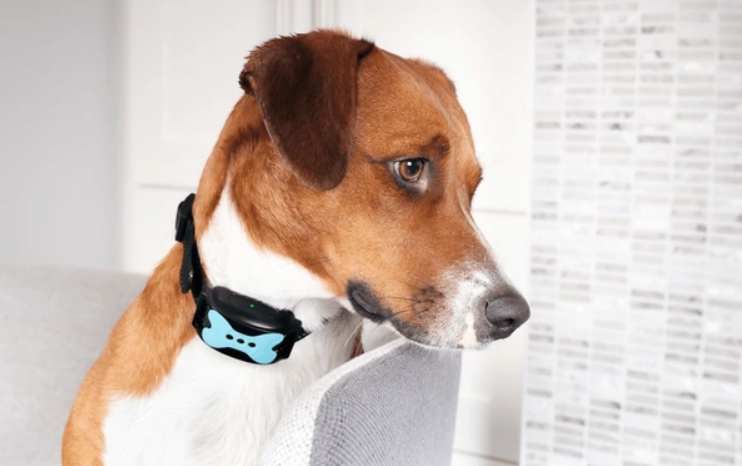
The Dogtra 1900S is a state-of-the-art remote training collar designed to help dog owners and professional trainers teach dogs new behaviors or correct unwanted ones. Whether you’re working with a medium-sized dog, large breed, or stubborn temperament, the Dogtra 1900S offers a reliable and customizable solution for training. To ensure it works properly, it’s essential to correctly sync the collar with its transmitter. So, how to sync dogtra 1900s collar?
As my dog loved Dogtra collar, I started to get more information on it, I will provide a detailed, step-by-step guide on how to sync the Dogtra 1900S collar with its transmitter. Ensure your Newfoundland’s comfort and security with expert tips on how to ensure a safe collar fit for Newfoundland.
What is the Dogtra 1900S Collar?
Before we dive into the specifics of syncing the collar, let’s briefly discuss what makes the Dogtra 1900S a popular choice for dog training.
- Range: One of the standout features of the Dogtra 1900S is its impressive range of 3/4 mile (1200 meters). This makes it suitable for training in larger fields or open areas, allowing for flexibility and freedom of movement for both the dog and the handler.
- Stimulation Levels: The Dogtra 1900S offers 100 adjustable stimulation levels, ranging from 1 to 127, enabling fine-tuning of the correction intensity based on your dog’s needs. For sensitive dogs, lower levels can be used, while higher levels are suitable for more stubborn dogs.
- Nick and Continuous Modes: You can select between Nick (momentary) or Continuous stimulation, which can be especially helpful in certain training scenarios. The Nick Mode delivers a quick, short burst of stimulation, while Continuous Mode allows for a sustained correction for a longer period of time.
- Vibration and Tone: The collar also offers 3 levels of vibration and a tone function, making it an excellent choice for a broader range of training purposes. You can use the tone or vibration as a non-corrective signal before applying stimulation.
- Waterproofing: The Dogtra 1900S is IPX9K-rated, making it fully waterproof and able to withstand submersion up to 25 feet (7.6 meters), which is ideal for dogs that enjoy water activities.
- Battery Life: The collar uses a rechargeable lithium polymer battery. A full charge lasts approximately 12-20 hours depending on usage. The transmitter’s battery can last for up to 40-60 hours per charge.
Understanding these features will give you context for why syncing is such an essential process to get the most out of your Dogtra 1900S. Discover the ideal fit by learning what size collar for Newfoundland dog to ensure your pet’s comfort and safety.
The Importance of Syncing the Dogtra 1900S Collar and Transmitter
Syncing your collar and transmitter ensures that they communicate effectively and that commands sent from the transmitter are received by the collar receiver. If the two are not synced properly, the collar will not respond to the remote, and you will not be able to control the stimulation, vibration, or tone functions.

When syncing is successful, you’ll see a solid green light on the collar, confirming that the devices are paired and ready for use.
Here’s a quick FAQ table for How to Sync Dogtra 1900S Collar:
| Question | Answer |
| How do I sync the Dogtra 1900S collar? | Turn off both the collar and transmitter, then press the pairing button on the collar and transmitter. |
| How long should I press the pairing button? | Hold each button for 3-5 seconds until the LED light blinks, indicating they’re synced. |
| What if it doesn’t sync? | Turn both devices off, wait 10 seconds, and repeat the pairing process. |
| Do I need to sync the collar every time? | No, sync only when first pairing or after a reset. |
| What if the collar still won’t sync? | Ensure both devices are fully charged and try again. |
What You Need Before Syncing the Dogtra 1900S
Here’s a checklist of everything you’ll need to sync the collar properly:
- Fully Charged Devices: Both the collar and transmitter should be fully charged before attempting to sync them. Typically, it takes 2 hours to fully charge both the collar and the transmitter.
- Transmitter Battery Life: 40-60 hours of use.
- Collar Receiver Battery Life: 12-20 hours of use depending on settings.
- Clear Space for Syncing: Make sure you’re in a location free from electronic interference. This ensures that the syncing process is smooth.
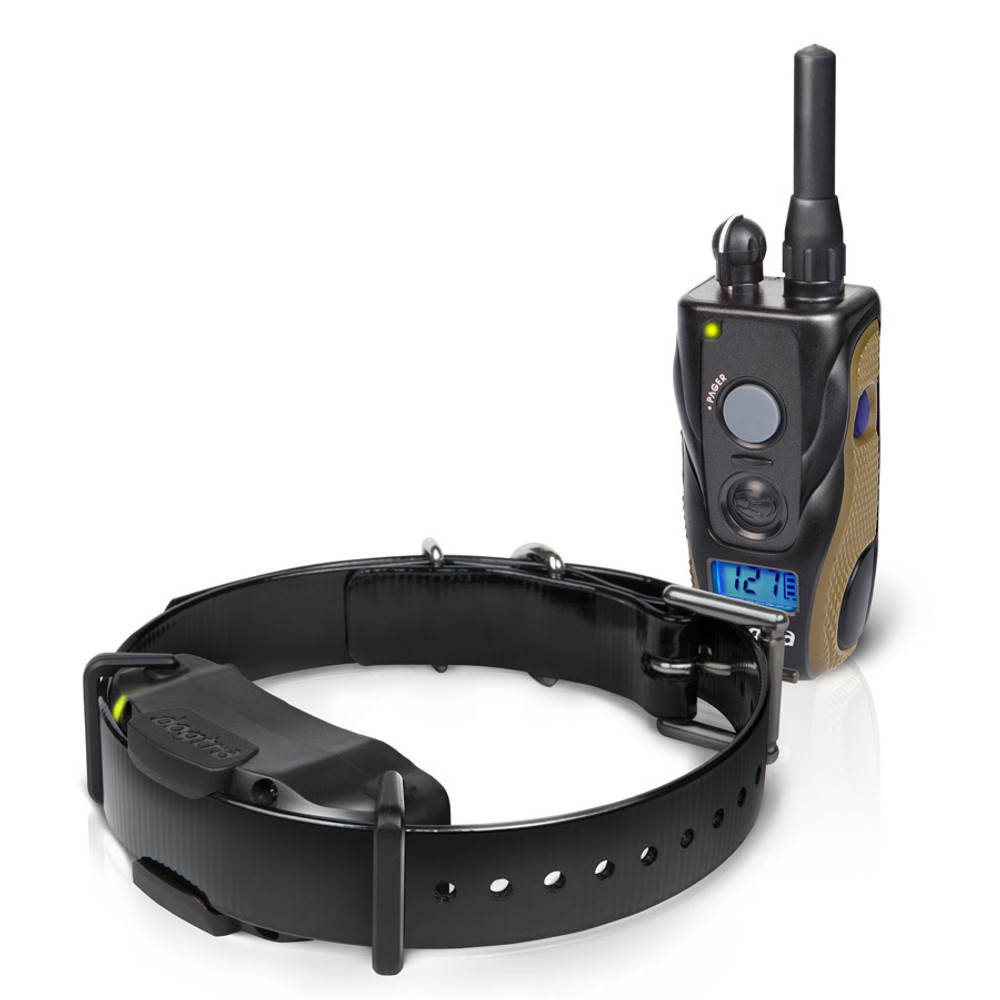
- Dogtra 1900S Collar and Transmitter: The collar receiver and transmitter are the key components of the Dogtra system. The collar is designed for medium to large-sized dogs, with adjustable neck sizes ranging from 10 to 24 inches (25 to 61 cm).
- User Manual: While this guide will walk you through the process, it’s helpful to have the Dogtra 1900S user manual nearby for specific troubleshooting or additional information.
How to Sync the Dogtra 1900S Collar | Step-by-Step Guide
Here’s a detailed guide to syncing the Dogtra 1900S collar and transmitter:

Step 1: Power On the Collar Receiver
- Begin by pressing and holding the power button on the collar receiver for 3-5 seconds until the LED light starts flashing.
- Red Light: The collar is low on battery.
- Green Light: The collar is fully charged and ready to be synced.
- Ensure that the collar’s contact points are clean and free from any debris, as this can affect performance and communication.
Step 2: Power On the Transmitter
- Similarly, turn on the transmitter by pressing and holding the power button for 3-5 seconds.
- The green LED will illuminate, signaling that the transmitter is ready for use.
- Make sure the transmitter’s battery level is sufficient for pairing. This is critical to avoid syncing issues.
Step 3: Put the Collar in Pairing Mode
- On the collar receiver, locate the pairing button, usually near the power button.
- Press and hold the pairing button for 5-10 seconds.
- The collar’s LED light will flash rapidly, indicating that it is now in pairing mode.
- If the collar does not enter pairing mode, repeat the process or ensure both devices are properly charged.
Step 4: Sync the Collar with the Transmitter
- Once the collar is in pairing mode, press the sync button on the transmitter.
- The sync button is typically located on the side or back of the transmitter.
- Within 30 seconds, the collar’s LED will change from flashing to a solid green light, confirming a successful sync.
- If the LED remains flashing or turns red, the pairing has failed, and you will need to try the syncing process again.
- If syncing is unsuccessful after several attempts, refer to the troubleshooting section below.
Step 5: Test the Collar
After syncing, test the collar to ensure it is functioning correctly. Press any of the transmitter’s buttons to activate stimulation, vibration, or tone. The collar should respond immediately.
- Stimulation: Press the button to deliver stimulation and check if your dog reacts.
- Tone: Test the tone button to see if the collar produces a sound.
- Vibration: Test the vibration mode to see if the collar vibrates accordingly.
For expert tips on how to fit a collar on a Belgian Shepherd, this guide offers simple steps to ensure your dog’s collar fits securely and comfortably.
Troubleshooting Tips: What to Do If Syncing Fails
Sometimes, syncing can fail due to various factors such as battery issues or interference. Here are some tips to resolve syncing issues:

- Ensure Devices Are Charged: Low battery levels can prevent the devices from syncing properly. Both the collar and transmitter should be fully charged for optimal syncing.
- Reset the Devices: Turn both the collar and transmitter off, then power them back on and try the syncing process again. It may take a few attempts to establish the connection.
- Clear Interference: If you’re in an area with multiple electronic devices, try moving to a quieter space, as interference can affect syncing.
- Check Pairing Mode: Make sure you are following the steps exactly to put the collar in pairing mode. If the collar’s LED doesn’t flash rapidly, the device might not be in pairing mode.
- Sync Within 30 Seconds: Timing is important. You must sync the devices within 30 seconds of putting the collar in pairing mode.
For detailed guidance on selecting the correct collar size for a Belgian Shepherd, this article provides essential tips to ensure your dog’s comfort and safety.
4 Must-Know Functionalities of the Dogtra 1900S
Once your Dogtra 1900S collar is synced, you’ll be able to use its advanced features for training your dog. Here’s a breakdown of some of the additional capabilities that make this collar highly effective:
- 100 Adjustable Stimulation Levels (1-127): The collar offers a wide range of stimulation levels, from 1 (lowest) to 127 (highest), to accommodate dogs of various temperaments. You can adjust the intensity based on your dog’s reaction and sensitivity.
- Range of 3/4 Mile (1200 Meters): The Dogtra 1900S is effective for training dogs at distances up to 1200 meters. Whether you’re in a park, field, or large backyard, the collar provides ample range for remote control.
- Tone and Vibration: These features are excellent for attention-getting or providing a non-aversive signal before applying stimulation. The collar has 3 vibration levels to suit different training needs, from gentle to more intense vibrations.
- Waterproof and Durable: The IPX9K-rated waterproof collar can withstand immersion up to 25 feet (7.6 meters). This makes it perfect for dogs that enjoy swimming or outdoor activities in harsh weather.
Wrap Up
Syncing your Dogtra 1900S collar is a crucial step to ensuring effective communication between the transmitter and receiver. This process involves powering on both devices, entering pairing mode, and pressing the sync button on the transmitter. Hope so, now you know how to sync dogtra 1900s collar.
The Dogtra 1900S offers a range of features that allow you to customize your dog’s training experience, from 100 levels of stimulation to tone, vibration, and an impressive 3/4 mile (1200 meters) range. Ensuring that the devices are synced correctly is key to making the most of these features and achieving successful training outcomes.
By following this detailed guide, you can easily sync your Dogtra 1900S collar, troubleshoot syncing issues, and start training your dog more effectively. Whether you’re working on basic obedience or more advanced behavior modifications, the Dogtra 1900S will help you manage your dog’s training with precision and reliability.
Discover the perfect collar size for an Anatolian Shepherd Dog to ensure comfort and security for your furry friend.